
I don't really know why this battleground is my second Call to Arms. It's the one I hate the most... Probably because I've been in it so damn much it's quite easy to see which tactics work, which don't work, and which Alliance people I so wish got knocked off into the abyss by an Ele Shammy for being so dumbtarded.
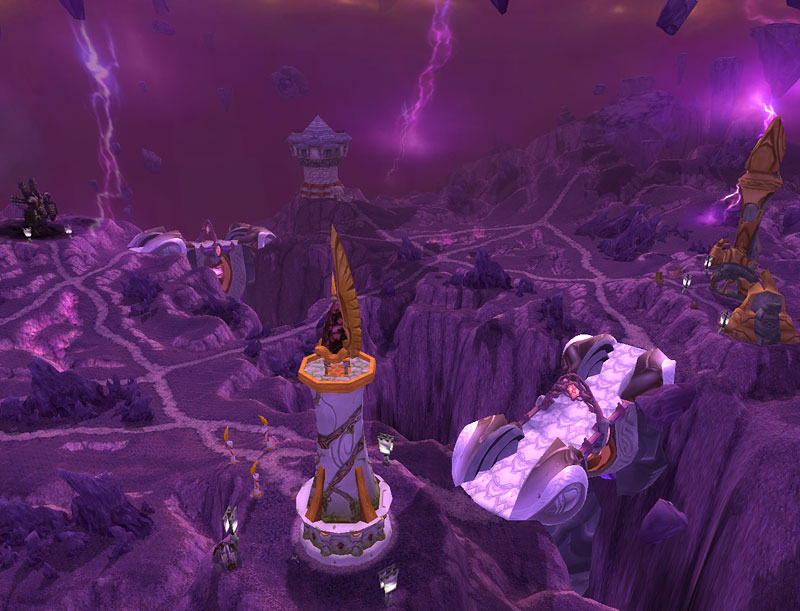
Anyhow, Eye of the Storm made its début in the Burning Crusade expansion. The setting is either in Netherstorm or a chunk of land off Outland that has the same properties as Netherstorm, as a battle for control for that chunk of land. Four key points on this chunk of land are of interest: the Fel Reaver Ruins; the Mage Tower; the Draenei Ruins; and the Blood Elf Tower, all in four corners of the map. There is a land bridge down the centre of the island that is a key choke point that the Alliance and Horde fight for, with a desirable flag to mark your territory with.
The aim of the game is to be the first team to hit 1600 points. You can earn points in two ways - one primary and one secondary. The primary way is to capture the four places mentioned above, with the more bases you own, the faster your points generation is. The secondary way is picking up the flag in the centre, then dropping it off at one of your bases - the more bases you own gives you more points per capture. I call this one secondary because it's based on the amount of primary objectives you've obtained.
So this battleground seems to be a mixup of Capture the Flag and Domination style FPS games (or for the WoW similarities, a mixup of Warsong Gulch/Twin Peaks and Arathi Basin/Battle for Gilneas). The basic tactics would appear to be: to capture the bases, then get the flag in the centre for a quicker victory. Well, it goes a little deeper than that, as well as a some tactics outright ignoring the flag in the centre.
First thing's first, a general tactic that matches in with all the others is that you should spend no longer than 30-45secs in open space, with the exception of flag hunting in a 2-2 base strategy. Another rule of thumb is that, as it's a fairly big place - COMMUNICATE! Let people know of incomings, so that the rest of the group can adjust.
There are three main tactics that I like to use in EotS, that can be switched between upon a whim depending on how the opposition reacts - although it is best to try to stick to the onei tactic.
For easy reference, here are the terms that I use when inside the BG:
EotS: The BG itself
Spawn: The floating rocks you start in for Preparation
MT: Mage Tower, bottom right/south east side of the map
DR: Draenei Ruins, bottom left/south west side of the map
FRR: Fel Reaver Ruins, top right/north east side of the map
BET: Blood Elf Tower, top left/north west side of the map
Flagpoint/FP: Where the flag spawns, centre of the map.
Home bases: The two bases closest to your spawn point. For Alliance this is MT and DR; for Horde this is FRR and BET.
Enemy bases: The two bases furthest away from your spawn point. For Alliance this is FRR and BET; for Horde this is MT and DR.
Tanks: While most of the time in PvP tanks are useless, having a Prot Warrior/Pala, Blood DK or Feral-Bear Druid in PvP gear carrying the flag in EotS can earn your healers some leverage.
2-2 with Flag Running
The first tactic is relatively simple. To put it bluntly, the minimum amount of bases you need to sustain is two. No matter how many flags you try to capture, keeping one base throughout will be tided over by the opposition's three by the time 1600 points is attained.
So the setup of two bases under your control becomes the first step. This is generally the easiest tactic to start off with, however expect your opponents to either mirror or go for another tactic below. But it is the easiest defensive tactic to implement: 5-6 at each of the nearby bases, which leaves a flag runner group of 3-5.
If the enemy are pushing bases, split up accordingly. Remember that bases are captured in a similar style to Tol Barad and many TBC PvP objectives: heavily outnumbering the opposition in an area means faster capture of the base. No flags or 10sec cast on a certain area, you just have to be there, and be unstealthed. So if the Horde decided to zerg DR with 12 players, the players at DR would be better off going to MT, then the flag running group and the old Alliance at MT would be better off to push for FRR. Most of the time, go for the diagonal opposite to where the enemies go. With all PvP however, these aren't scripted encounters so you may have to skip a base and go for the next one along.
Once two bases are in control and relatively safe, the flag running group can proceed to run to the middle, get the flag and cap it, or chase after the enemy flag runner(s).
Suggested setup:
0-1 Tanks
5 Healers
9-10 DPS
3 Bases to 1
This is easily my favourite tactic. This tactic ensures a win, if you keep hold of three bases for the majority of the battle. You don't need to capture any flags, but you do still need communication. What this strategy essentially entails is that you send seven people to one of your "home" bases, one to the other home base, and seven to the second base's opposite number.
So for example, if you were Horde, you could send seven to BET, one to FRR, and seven to MT, or adversely seven to FRR, one to BET, and seven to DR. As Alliance, the tactics would be to initially have one at MT, and seven at DR/FRR, or one at DR, and seven at BET/MT.
If the opposition decide to zerg a base that has seven, or cut through FP to get your lone defender, communication is key. Simply shuffle along your defenders so that diagonal opposites have a larger defense, and the base in between has a few. This will happen more than you might expect, considering you're blockading 15 enemies into one base, they do have a tendency to all actually wait back a bit instead of fragmenting themselves straight from the graveyard to either one or two bases.
The person on their own must call out for any incomings, and how many, so that the two neighbouring bases can send one or two players each. Whoever you choose for this role may differ from group to group, although personally I like to see a Disc Priest or Resto Druid as they can withstand a lot of incoming damage and can essentially "tank" a group of players until backup arrives.
Suggested setup:
0 Tanks
4-6 Healers
9-11 DPS
4-0 Quick Win
Hardest strategy to implement, especially against other organised teams, but if you get lucky, you can suppress the opposition into a quick win. This strategy involves pushing the enemy back and barring off any attempts to bypass your force.
This means that the bulk of your attack will be going toward the enemy bases - around 6 to each, being on the lookout for any enemies trying to sneak past. The last three need to be dynamic: they will start off by going through the middle, intercepting any enemies that attempt to go past, and then the two side groups need to quickly count how many enemies are at the enemy bases, so the three can quickly flank and suppress the rest of the opposing force.
Once that is done, the three backup the other enemy base, while one person from the first base goes back to take the direct opposite base (so travel between BET and DR, or between FRR and MT). The five that are left need to start heading toward the enemy's spawn point and stop any from going past. This involves being on the constant lookout for stealthers, so be aware. When the second enemy base is taken, again one person from that group goes back to take the corresponding home base, while the rest suppress the enemy back to spawn point.
If the attackers do their job properly, you should get two very bored players at the home bases, and thirteen will be surrounding their spawn point. As you can probably tell from this, it'll be difficult to hold the enemy back as it'll be their 15 against your 13, so clever play is suggested. The two home defenders will be keeping an eye on both their base, as well as the direct opposite base while the 13 attackers need to keep the enemies from getting to any of the bases, or to the middle.
If you desire a quicker win, you can turn into a 12-man attack force, and have a Druid/Shaman flag running solo.
Suggested setup
0 Tanks
4-6 Healers
9-11 DPS
Three Paladins are also suggested for the quick travel between bases.
Zerg without Flag Capture
This is one of the easiest tactics to implement spontaneously. It is essentially sending 10-13 people to one base at a time with a second 2-5 lag-group to stay behind and stop opposition. The aim is to win by spending most of the match by holding two bases against the opposition's single base, with the final one being contended. As contended bases don't generate points the 2-1 setup should prove fast-paced, yet slow win.
From time to time, you'll find this tactic is very demoralising to the other team with the constant death whenever defending, that end up "giving up". It's in human nature to be upset when you lose something, and this tactic ensures that the opposition will be consistently losing bases throughout the match - you will be too, but that's what you're planning to happen anyway.
The tactic works around the basis that the "attacking group" of 10-13 players would basically only stop to kill enemies at the base. Doing this alone with a large group of people should turn the base into contested, but that shouldn't matter as it's the job of the 2-5 people behind to capture the bases. As soon as the enemies are dead, the attacking group moves on to wherever the leader tells them, it's as simple as that.
Suggested setup:
0 Tanks
3-4 Healers
11-12 DPS
Zerging with Flag Running
This tactic works similar to the previous one, with the only difference being that the bases captured by the attack group come a little slower, but are more random and should earn slightly faster point generation.
This tactic involves the attack group going to the middle whenever they don't have the flag, then running toward an enemy-owned base with the flag. Their aim is to then capture the base, and score the flag. The rest of the team tries to maintain defense on one or two other bases, but need to know when to run and when to defend. Try not to capture the flag when there's only one base, as that only rewards 75 points, as opposed to the 85 points earned from two bases, or 100 from three. So if your team is about to score, don't give up the base too easily.
Once the attacking group's base and flag is captured, they return to the middle and repeat the process, the defending teams will need to move around the map when they know they'll be overpowered by the enemy. Typically the attack team has 5-9 people in them, with 6-10 defenders, depending on how many bases you wish to keep hold of.
Suggested setup:
1 Tank
4-6 Healers
8-10 DPS
Good luck and try not to get under the weather! *groans from audience*